Supplies:
- desired design
- blank stencil
- sharpie
- scissors
- mirror or glass
- glass cleaner
- paper towels
- paint brush
- etching cream
- rubber gloves
- source of water
- repositionable adhesive spray
- rolling pin
- desired design
- blank stencil
- sharpie
- scissors
- mirror or glass
- glass cleaner
- paper towels
- paint brush
- etching cream
- rubber gloves
- source of water
- repositionable adhesive spray
- rolling pin
Step 1: Before you begin, clean your mirror or glass with glass cleaner to remove any dirt or oil. It is important that the surface is clean when etching.
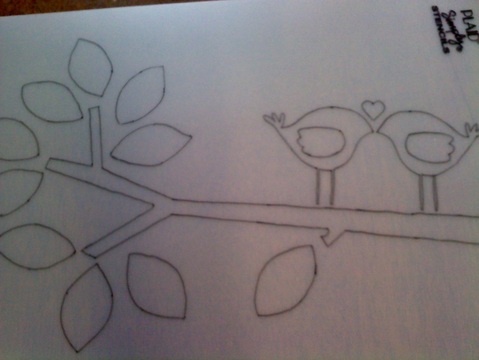
Step 2: Place blank stencil over top of your desired design. Be sure that the design will not move as you are tracing. Trace the design onto the blank stencil with your sharpie.
The picture below shows what the blank stencil looks like with the design still underneath of it and traced out.
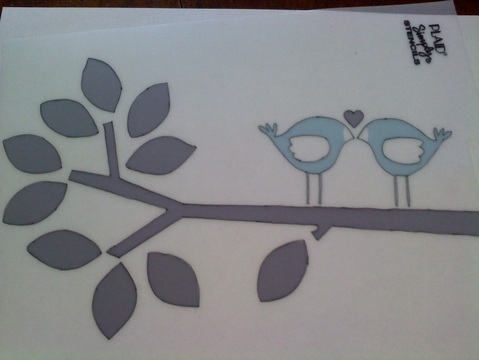
This picture shows what the blank stencil looks like with the design removed. You can see how the design has been transferred onto the blank stencil. Now for the tough part...
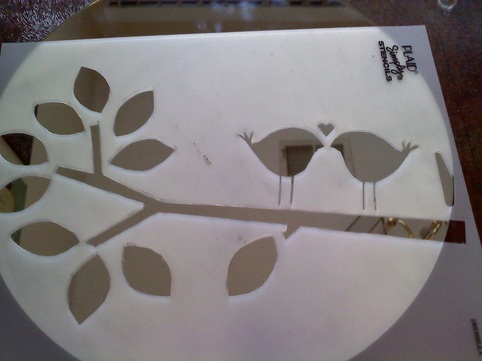
Step 3: The hardest part for me was cutting the design out of the stencil. It depends on what design you use because the more curves you have, the harder it will be. Use an Exacto knife and cut out your design by following the lines that you traced.
Step 4: Typically you would use a stencil that is specifically for etching because it is sticky on the back. It is important that the back of the stencil is sticky so that there are now gaps between the stencil and the material that you are etching on. If there is, you will not have crisp lines on your finished product since the etching cream will ooze behind the stencil (NO GOOD!). So...
Use repositionable adhesive spray on the back of your stencil. Be sure to read the instructions on the can before using. Then, position your stencil where you want the design to be located and press down. To be sure that there all of the corners are firmly attached to the mirror or glass, go over the stencil with a rolling pin.
Use repositionable adhesive spray on the back of your stencil. Be sure to read the instructions on the can before using. Then, position your stencil where you want the design to be located and press down. To be sure that there all of the corners are firmly attached to the mirror or glass, go over the stencil with a rolling pin.
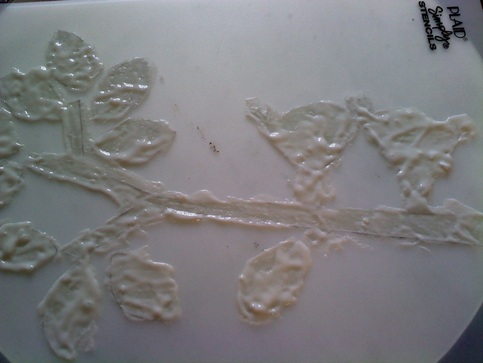
Step 5: Be sure to put on your gloves before beginning this step - apparently this stuff can really burn your skin! Apply a liberal amount of etching cream onto the surface you wish to etch (aka. fill in the holes - ha!). Be sure that you fill in all of the hard to reach corners. It will make a difference, trust me! Again, read the instruction on the bottle before using. My etching cream needed to sit for 60 seconds. This is a good time to start cleaning up some things to make pickup much easier at the end. :)
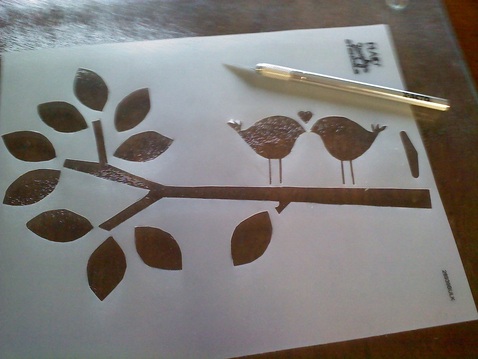
Here is what mine looked like...
Here is what mine looked like...
Step 6: Leaving your stencil attached, run water over top to remove etching cream. When I started doing this I was extremely disappointed. I really thought it did not work, or I did not wait enough time for it to set. Just go with it. You will be surprised! Once all of the etching cream is removed, remove the stencil, dry the surface and clean with glass cleaner (again). Your work of art is FINISHED!
Ta-da!
Ta-da!
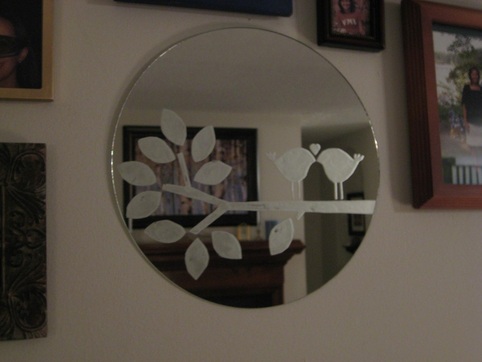
You can tell that mine is not perfect. I was SO temped to go back and try to fill in a couple of places. However, I do not really like the store-bought look, so I kept it the way it was. What do you think!?
If you try etching, please please please send me a picture. I would LOVE to see it and will feature it on my blog for others to see!
Off to the soccer fields I go! I hope everyone is enjoying their weekend!
Love,
Torrie Anderson
If you try etching, please please please send me a picture. I would LOVE to see it and will feature it on my blog for others to see!
Off to the soccer fields I go! I hope everyone is enjoying their weekend!
Love,
Torrie Anderson